Build Your Unity Game
Now that we have a game that we know is working, let’s build it so we can test it on the Madder Platform. First, you can remove theMadderControllerTest object from your scene. This object was only used to test the Madder
Controller in the Unity Editor.
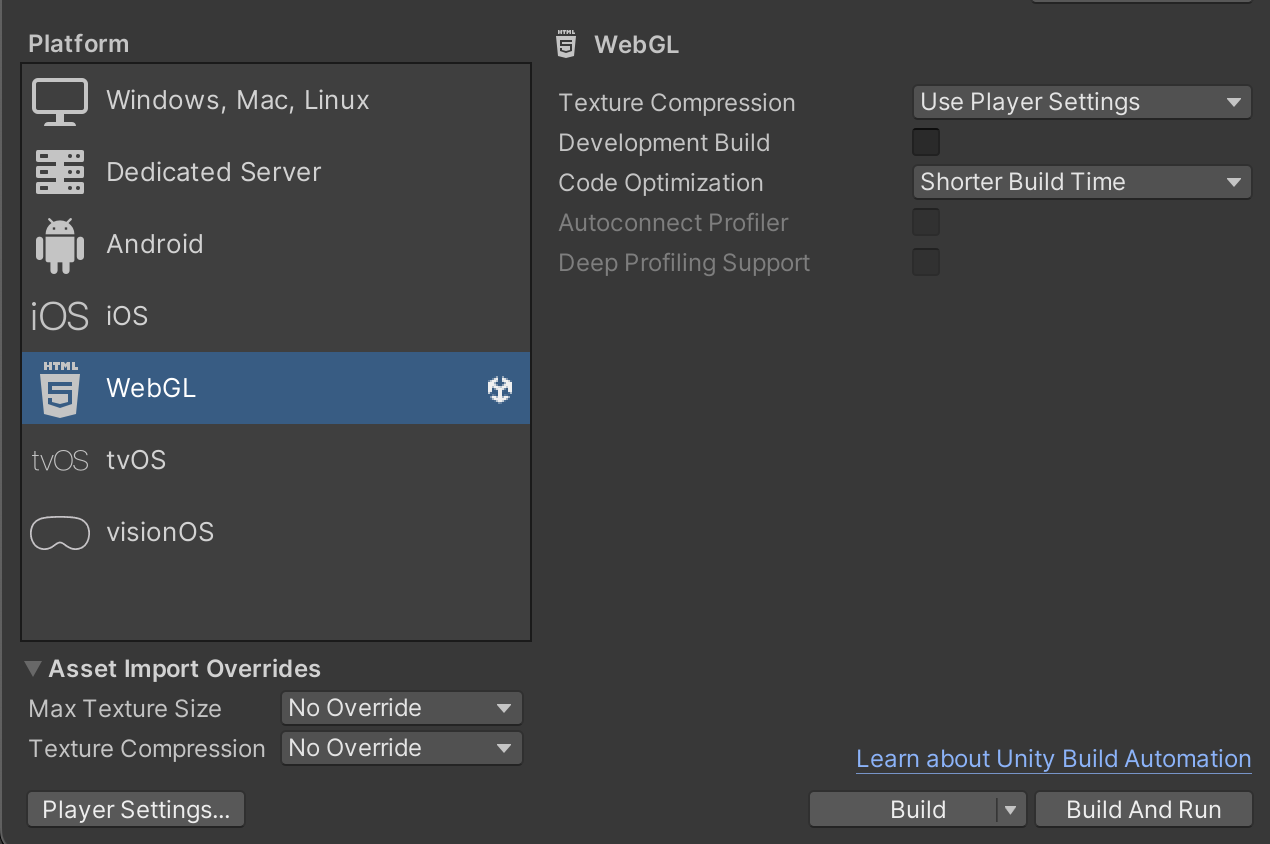
In the Unity Editor, go to File > Build Settings and select WebGL as the platform. Additionally, we recommend going to
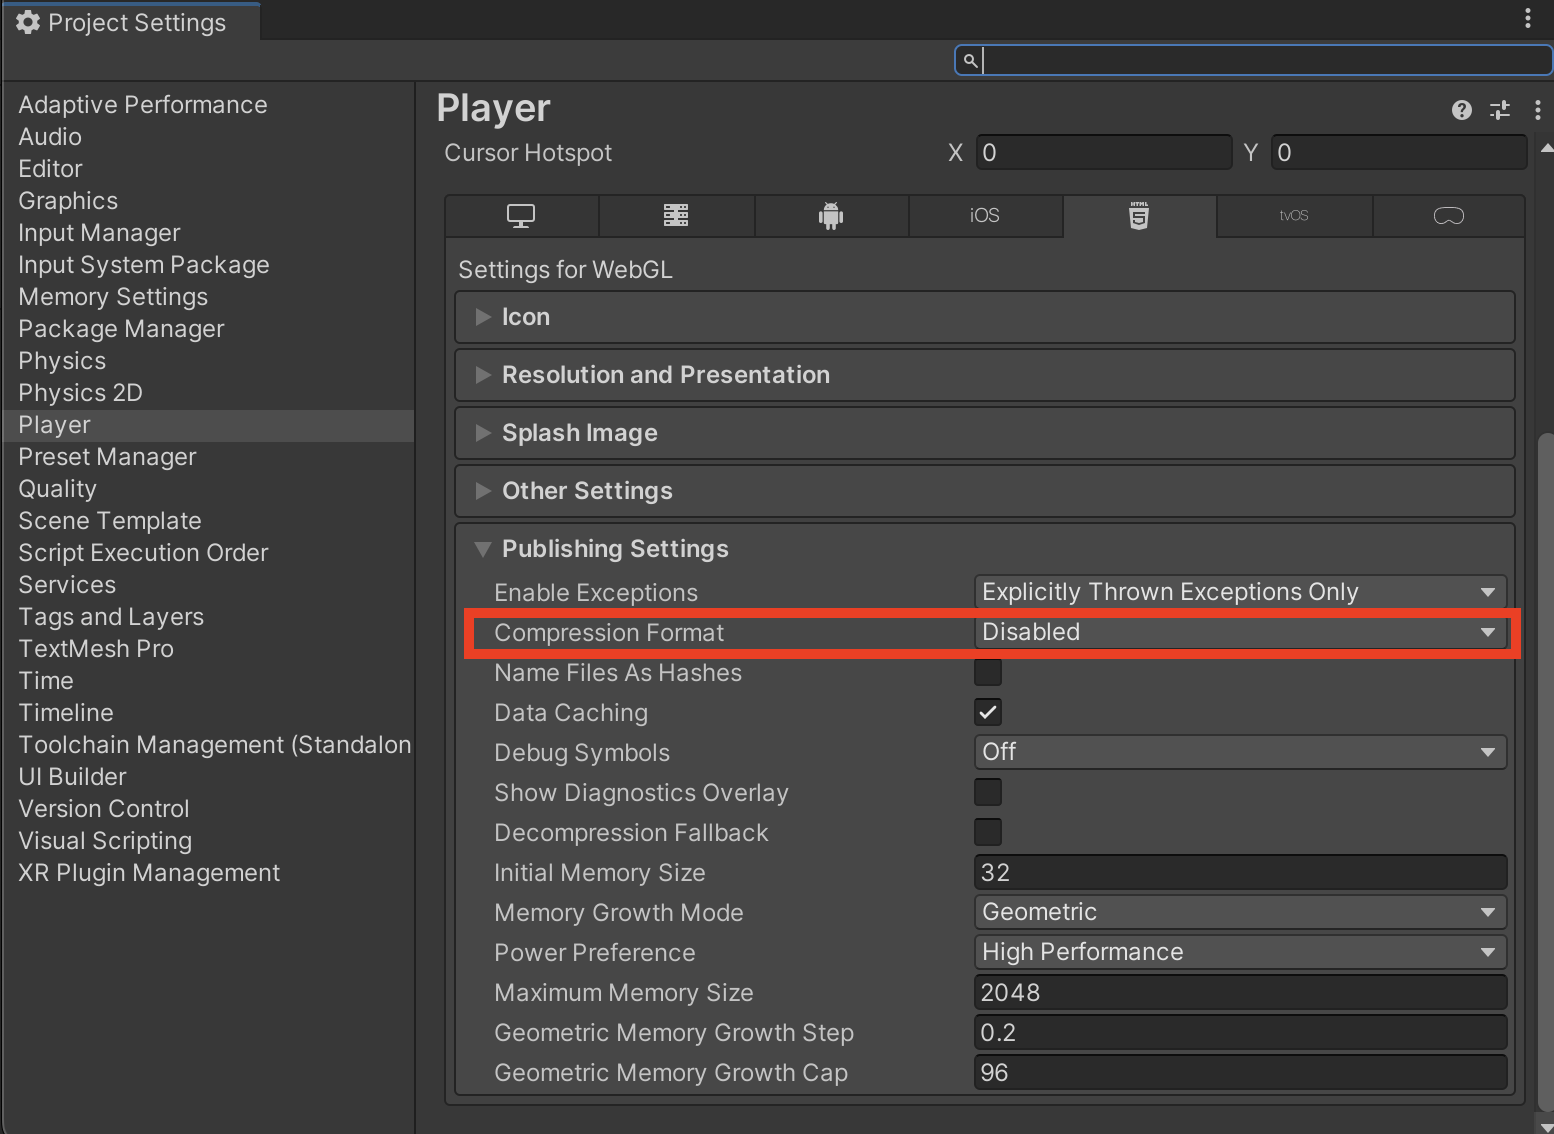
Player Settings > Publishing Settings and setting Compression Format to Disabled. This way you won’t have to
decompress the files each time you go to upload them to the Madder Developer Portal.
Switch Platform button in the Build Settings window so Unity
builds for WebGL, and click Build! Select a location to save the build, and Unity will create a folder with the build
files.
Upload Your Game
Now that you have a build of your game, you can upload it to the Madder Developer Portal. Go to the Madder Developer Portal and log in. You’ll be redirected to a page titledMy Games. Click the Add Game button to create a new game.


Test Game and move on to uploading our files.
In the Game Assets section, you can click the Upload button or drag and drop your build files into the box.
Upload the files Unity created for you:
- A .data file
- A .framework.js file
- A .loader.js file
- A .wasm file
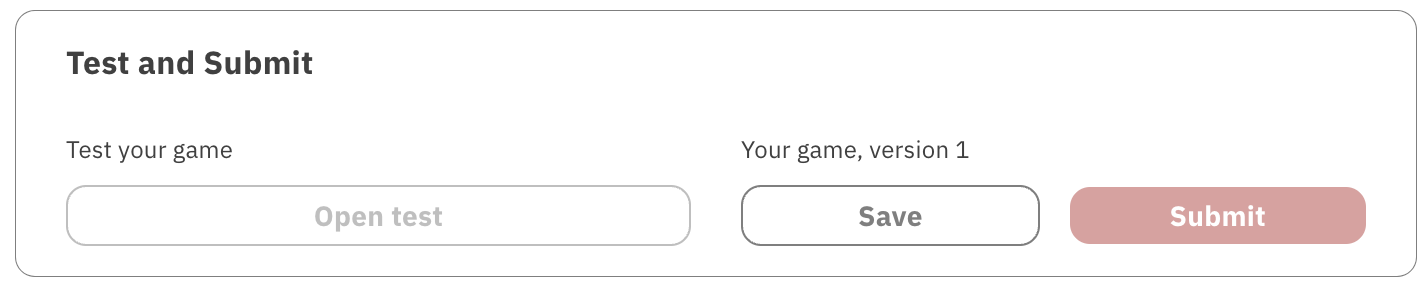
Save button in the Test and Submit section become active. Click Save to
save your game.
Test Your Game
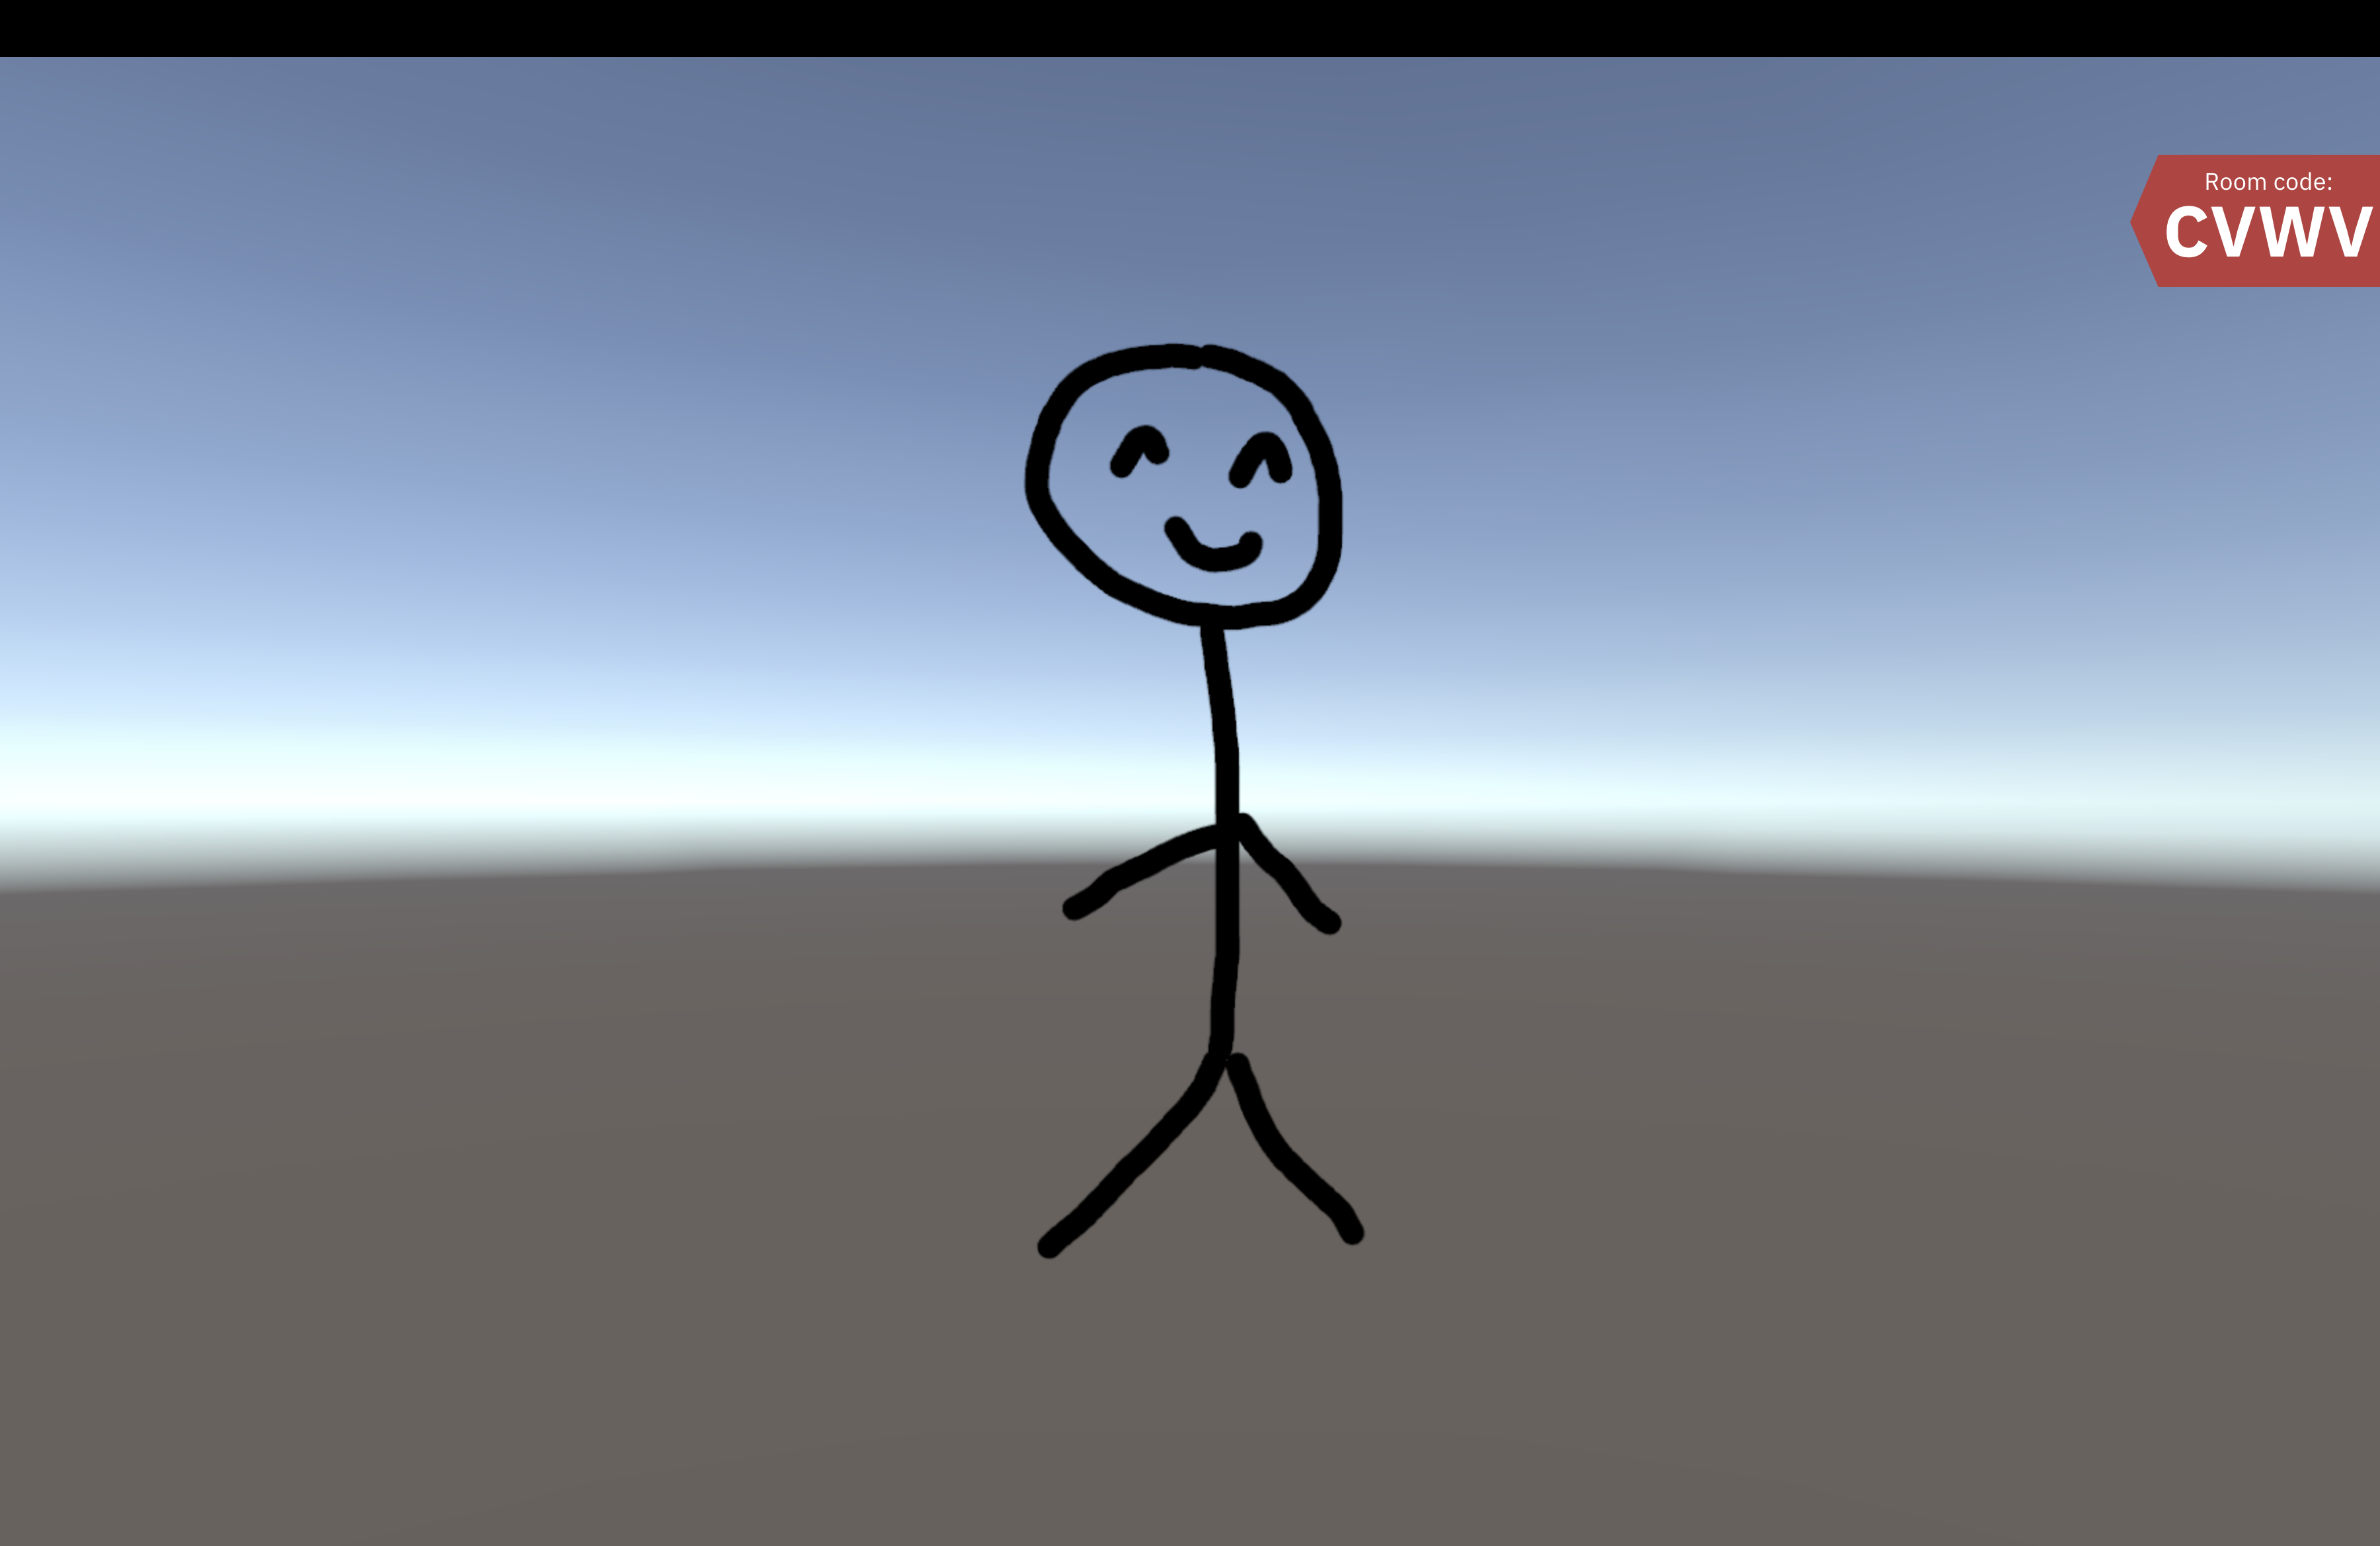
Once the save is complete, you can click theOpen test button to test your game. Your game will start in fullscreen
mode, just like you’ll see it on the Madder Console. Additionally, because we called ShowCode() in the Game Manager
on Start, the room code will be displayed on the screen.
Enter the room code into the Madder Controller app on your phone, and you will see the same stick figure you saw in the
Unity Editor. You can now test your game with the Madder Controller app! (Try pressing circle to see the stick figure
move faster!)
To see debug logs from your game, you can open the browser console. In Chrome,
you can do this by right-clicking on the page and selecting
Inspect. Then,
click on the Console tab. Any Debug.Log calls from your game will appear
here.Escape on your keyboard or move your mouse to the top of the screen and the Madder banner
will appear. Click the button in the top right to exit fullscreen.
To exit the test, move your mouse to the top of the screen so the Madder banner appears, and click the Exit button.